
Chapter 8: Customizing the UI
In this chapter, you'll customize forms, tables, and pages to create a polished interface.
Customizing Fields
Fields control how attributes appear in forms and displays. Plutonium auto-infers fields from your model, so you only need to declare fields when customizing their behavior.
Field Types
# packages/blogging/app/definitions/blogging/post_definition.rb
class Blogging::PostDefinition < Blogging::ResourceDefinition
  # Rich text editor instead of plain textarea
  field :body, as: :markdown

  # Select with predefined options
  input :status, as: :select, choices: %w[draft review published]
end
Conditional Fields
Show fields based on conditions:
# Only show published_at when published is true
field :published_at, condition: -> { object.published? }

# Show different fields for new vs existing records
field :author, condition: :new_record?
Customizing Tables
Columns are auto-inferred from your model. Only declare columns when customizing their behavior.
Column Configuration
# Custom label
column :user, label: "Author"

# Computed column with block
column :comment_count do |post|
  post.comments.count
end
Table Actions
# Show page actions
action :publish, interaction: Blogging::PublishPost, record_action: true

# Table row actions
action :archive, interaction: Blogging::ArchivePost, collection_record_action: true

# Index page actions
action :import, interaction: Blogging::ImportPosts, resource_action: true

# Bulk actions (selected records)
action :bulk_publish, interaction: Blogging::BulkPublish, bulk_action: true
Customizing Search and Filters
# Search configuration
search do |scope, query|
  scope.where("title ILIKE ? OR body ILIKE ?", "%#{query}%", "%#{query}%")
end

# Predefined scopes (reference model scopes)
scope :published  # Uses Post.published
scope :drafts     # Uses Post.drafts

# Inline scope with block
scope(:recent) { |scope| scope.where('created_at > ?', 1.week.ago) }

# Inline scope with controller context
scope(:mine) { |scope| scope.where(user: current_user) }

# Default scope
default_scope :published

# Filters
filter :title, with: Plutonium::Query::Filters::Text, predicate: :contains
filter :status, with: Plutonium::Query::Filters::Text, predicate: :eq

# Custom filter with lambda
filter :published, with: ->(scope, value) {
  value == "true" ? scope.where.not(published_at: nil) : scope.where(published_at: nil)
}

# Sorting options
sort :title
sort :created_at
sort :published

# Default sort
default_sort :created_at, :desc
Custom Page Classes
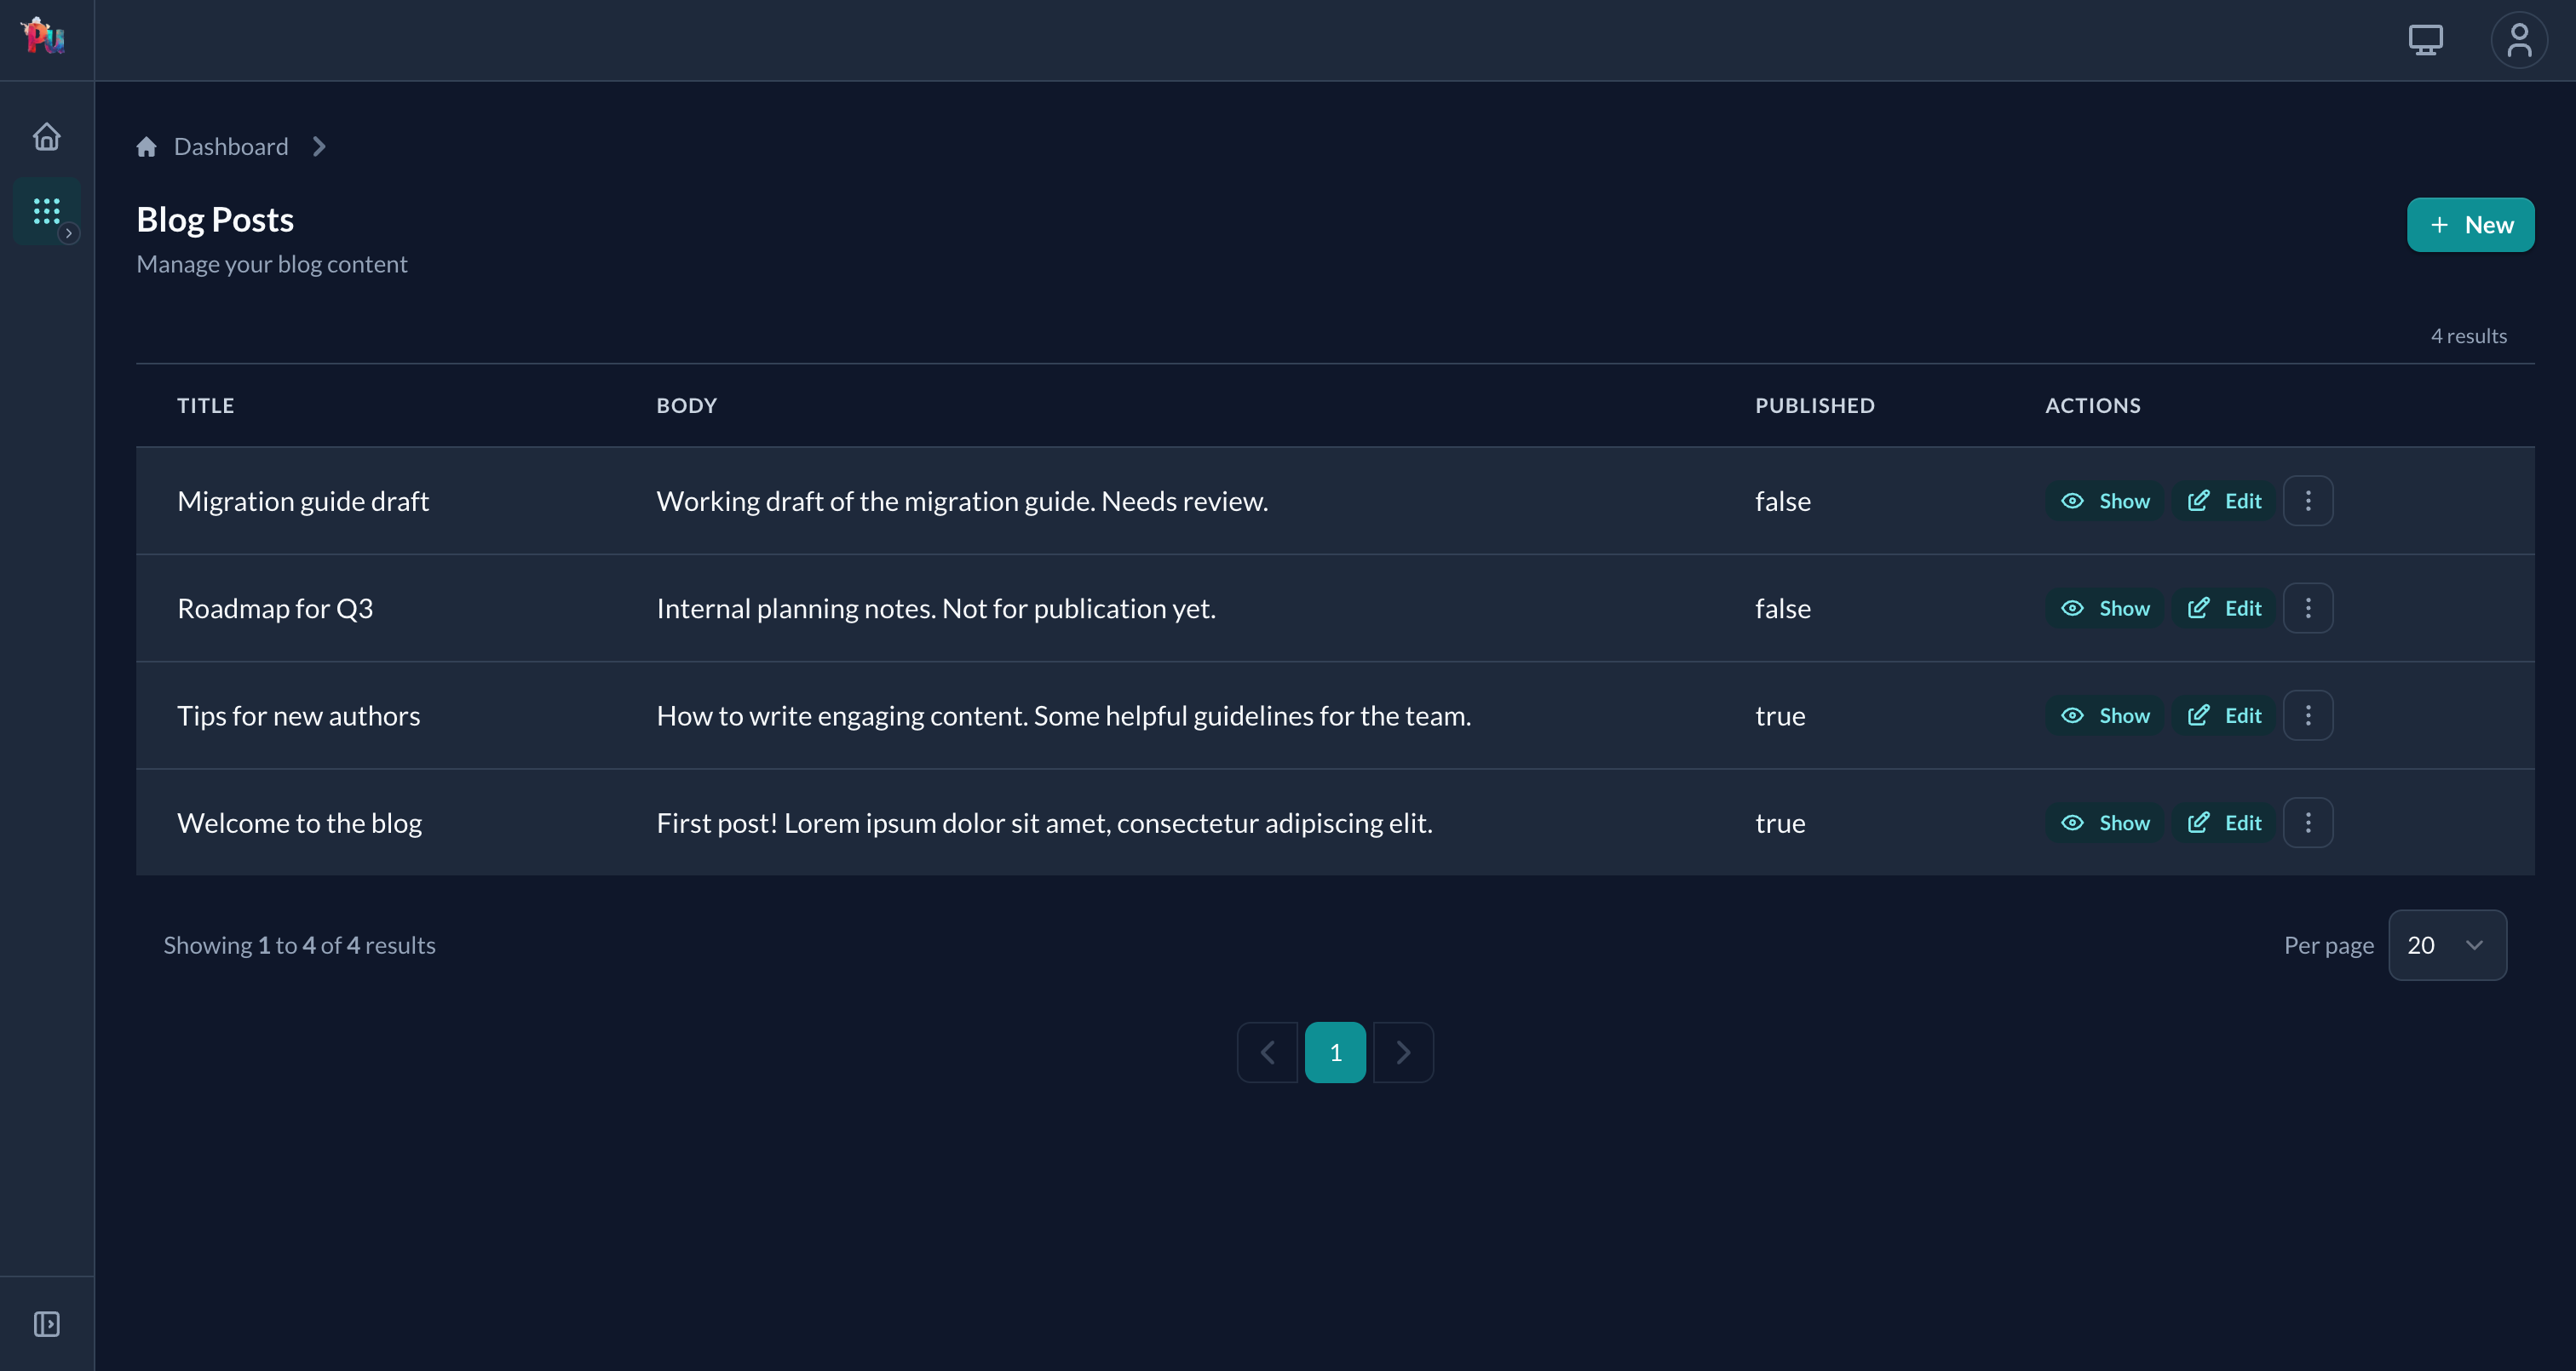
Override page title and description in definitions:
class Blogging::PostDefinition < Blogging::ResourceDefinition
  # Custom page titles
  index_page_title "Blog Posts"
  index_page_description "Manage your blog content"

  show_page_description "View post details"
end
These setters take a literal, or the definition's lazy t("some.key") to translate per request. They have no record context, so a title built from the record goes in a page_title override on the page class (below).
The default "Posts" heading becomes your branded title and description:
For more advanced customization, override the page class nested in the definition:
class Blogging::PostDefinition < Blogging::ResourceDefinition
  class ShowPage < ShowPage
    private

    def page_title
      object.title
    end

    # Add content after the page header
    def render_after_page_header
      div(class: "pu-alert pu-alert-info", role: "status") do
        div(class: "pu-alert-message") { t("blogging.posts.show.comment_count", count: object.comments.count) }
      end
    end
  end
end
pu-alert pu-alert-<success|warning|danger|info> is the banner the flash messages use, with dark-mode colors built in. The text comes from a locale key (see i18n).
Custom Form Layout
Control form layout using wrapper options in definitions:
class Blogging::PostDefinition < Blogging::ResourceDefinition
  # Full-width fields
  input :title, wrapper: {class: "col-span-full"}
  input :body, as: :markdown, wrapper: {class: "col-span-full"}

  # Side-by-side fields (default is col-span-full)
  input :published_at, wrapper: {class: "col-span-1"}
  input :category, wrapper: {class: "col-span-1"}
end
For advanced form customization, use the block syntax:
input :birth_date do |f|
  f.date_tag(min: 18.years.ago.to_date)
end
Theming with TailwindCSS
Plutonium uses TailwindCSS 4. Out of the box the app serves the gem's prebuilt CSS, so first switch it to your own build:
rails generate pu:core:assetsBrand colors are Tailwind palette colors compiled into the CSS, so change them in the generated tailwind.config.js through plutoniumTailwindConfig.merge, then rebuild:
// tailwind.config.js
theme: plutoniumTailwindConfig.merge(plutoniumTailwindConfig.theme, {
  extend: {
    colors: {
      primary: { 500: '#6366f1', 600: '#4f46e5', 700: '#4338ca' },  // Indigo
    },
  },
}),
Surfaces, borders, radii and shadows are --pu-* tokens. Override them after the Plutonium import in app/assets/stylesheets/application.tailwind.css, and repeat every one you change in a .dark block so dark mode gets its own value:
:root {
  --pu-radius-md: 0.5rem;
  --pu-shadow-md: 0 4px 6px -1px rgb(0 0 0 / 0.1);
}

.dark {
  --pu-shadow-md: 0 4px 6px -1px rgb(0 0 0 / 0.4);
}
Custom Components
Create reusable components with Phlex:
# app/components/status_badge.rb
class StatusBadge < Plutonium::UI::Component::Base
  def initialize(published:)
    @published = published
  end

  def view_template
    if @published
      span(class: "pu-badge pu-badge-success") { t("blogging.posts.status.published") }
    else
      span(class: "pu-badge pu-badge-warning") { t("blogging.posts.status.draft") }
    end
  end
end

# Use in definition
column :status do |post|
  render StatusBadge.new(published: post.published?)
end
Layout Customization
Layouts are Phlex components that wrap page content. The base layout provides hooks for customization:
class CustomLayout < Plutonium::UI::Layout::ResourceLayout
  private

  # Customize body classes
  def body_attributes
    {class: "antialiased pu-min-h-viewport bg-[var(--pu-surface)] text-[var(--pu-text)]"}
  end

  # Add content before the main section
  def render_before_main
    super
    # Add custom header content
  end

  # Add content after the main section
  def render_after_main
    super
    # Add custom footer content
  end
end
See the Theming Guide for comprehensive customization options.
What's Next
Congratulations! You've built a complete blog application with:
- Resource CRUD operations
- Authentication with Rodauth
- Authorization with policies
- Custom actions with Interactions
- Nested resources
- Multiple portals (Admin and Author)
- Customized UI
Continue exploring:
Happy building with Plutonium!